Share it! Science : environment
Showing posts with label environment. Show all posts

Thanksgiving Dinner Trophic Pyramid Activity

Those school days before a break, holiday or vacation can be pretty exhausting for a teacher. The kids are excited and wiggly (can you blame them?) The teachers are running out of steam. There are often special assemblies, field trips and other things that make the normal schedule not so normal, adding to the fun. It is an uphill battle!

When I was teaching during chaotic times like these I tried to find a way to create activities that still allowed for learning but were not too vexing for the students or myself. The day before Thanksgiving was one of these times! 

I would teach a unit on ecosystems with my fourth graders, including food webs, chains and trophic levels. To wrap this up before we took a few days to stuff ourselves with turkey I liked to do this easy "Thanksgiving Dinner Trophic Pyramid" science activity. It really illustrates that humans also consume more at the lower levels of the energy pyramid, just as in any ecosystem.

This post contains affiliate links, meaning I will receive a small commission (at no additional cost to you) if you make a purchase after clicking a product link. Please see disclosures page for more details.


Materials for Thanksgiving Dinner Trophic Pyramid

You will need:

Background Information for Trophic Pyramid Lesson

A trophic pyramid, also known as an ecological pyramid or energy pyramid is a graphical representation of food energy levels in an ecosystem. In other words, who eats who and how energy moves up the food chain. The widest part of the pyramid is made up of plants, the narrow point at the top is reserved for the top predator/carnivore. For more background and an activity to learn about trophic pyramids, check this lesson out.

A great book for learning about how energy moves through an ecosystem or food chain is: Pass the Energy Please! by Barbara Shaw McKinney. It's great for a read-aloud (even to early middle-schoolers) or as inspiration for writing and illustrating food chain rhymes.

Thanksgiving Dinner Trophic Pyramid Activity


Draw a very large triangle on the white board, or mark off a triangle on the floor with tape. Give it 4 sections, labeled from bottom to top: "Producer", "Consumer-Herbivore", "Consumer-Omnivore/Carnivore", and "Apex or Top Predator".  You can also get the printable version of the trophic pyramid here.

Give students three 3x5 cards, or post-it notes. Instruct them to draw and label something they like to eat or drink on Thanksgiving on each card. They will then tape their card up in the part of the pyramid they believe it belongs in: "Producer", "Consumer-Herbivore", "Consumer-Omnivore/Carnivore", and "Apex or Top Predator".

Some might fit in more than one category based on ingredients. In general all plant-based items should go in the "Producer" section, any animal products will go in the "Consumer" sections, based on what type of animal. Most likely for your purposes, you won't have anything that goes in either "Consumer-Omnivore/Carnivore", and "Apex or Top Predator" sections.

When finished discuss what they notice about the diagram. For sample questions, download the Thanksgiving Trophic Pyramid lesson plan here. 

More Food Science Activities for Thanksgiving 

Try these other fun science activities with your children or students in November: 


20 Earth-Friendly Activities and Ideas for Earth Day and Every Day


Earth Day is April 22nd, but you can celebrate and care for our wonderful planet every day of the year. Here are over 20 different activities and ideas from Share it! Science to get you started.

Reduce, Reuse, Recycle and Conserve! 

The Best Demo for Teaching Water Conservation 
Teach water conservation with this hands-on demonstration, it will blow your mind!

The Best Demo for Teaching Water Conservation

Composting with Worms! A Great Activity for School or Home
Did you know worms can recycle your food scraps? Learn how to build a worm composter here!

Composting with Worms DIY worm bin
 
Compost Science Projects for Kids- Growing with Science
Hop on over to the Growing with Science blog to study decomposition and compost creatures. Great activities and some awesome pictures of "nature's recyclers"!

http://blog.growingwithscience.com/2016/03/compost-science-projects-for-kids/

Make the Earth Beautiful with Homemade Seed Paper
Learn how to recycle paper into seeded paper that you can plant! Makes a great gift too!

DIY recycled seed paper


"Here Comes the Garbage Barge" Inspired Landfill Model. 
Learn more about conservation by investigating trash and landfills with a story and activity.

http://www.shareitscience.com/2017/03/storybook-science-garbage-barge-landfill-model.html


Grow Something! 

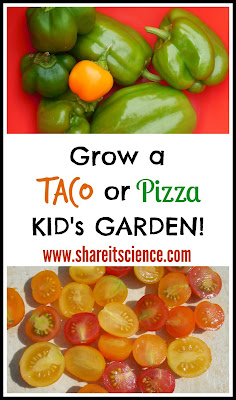
Grow a Taco or Pizza Garden with Kids
Get kids involved in gardening by growing a taco or pizza themed garden. Ideas here!


Grow a Taco or Pizza Garden gardening with kids theme gardens


Grow a Themed Flower Garden with Your Children
Involve your kids in the garden by growing a rainbow garden or a pollinator garden. Not only fun, but a great learning experience as you attract butterflies and other insects to your yard.

Grow a Rainbow or Butterfly Garden with Kids

Saturday Science Experiment: Grow an Avocado
Did you know you can grow a new houseplant from an avocado pit? Find out how.


Grow an Avocado- Hands on Science Experiment for kids


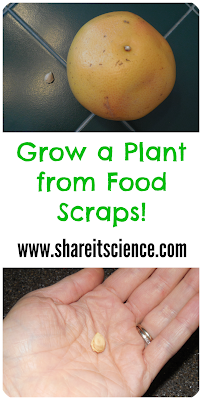
Saturday Science Experiment- Grow a Plant from Food Scraps
Avocados aren't the only houseplant you can grow from the bits left behind by fruits and veggies. Check out these ideas.

Grow a Plant from Food Scraps science for kids

25 Weeks in the Garden
25 weeks of my "Glimpse of the Garden" series. Lessons in gardening, insect and plant science along with anecdotes of a garden season.

garden lessons insect plant science


Get Involved!

Celebrate Citizen Science Day! 
April 16th, 2016 was the first National Citizen Science Day! Learn how people just like you can get involved in science research projects around the United States.

get involved in citizen science citizen science day


Insect Investigations: Summertime Citizen Science
Learn about some fun insect citizen science projects, like the Lost Ladybug Project and Firefly Watch. Stay involved in science all summer long!


http://www.shareitscience.com/2015/07/insect-investigations-summertime.html


Science Teacher's Toolbox: Testing Water Quality
Easy ways to test the water quality in your area. Activity suggestions for home scientists, school, camp or after school programs, etc.

http://www.shareitscience.com/2015/06/science-teachers-toolbox-testing-water.html
 
Project BudBurst: Easy, Authentic Plant Science
Do you love getting kids outside? Project BudBurst is a great way to get kids of all ages involved in citizen science, honing observation skills and developing a stronger sense of place. Easy to incorporate at home or school!

Project BudBurst: Easy, Authentic Plant Science citizen science


Penguin Watch and Other Ways YOU Can be a Scientist!
Lots of ideas for getting involved in citizen science, including helping scientists look for penguins- right from your computer!

http://www.shareitscience.com/2014/10/penguinwatch-and-other-ways-you-can-be.html


Learn! 

"Flight of the Pollinators" a Picture-Perfect Science Lesson
Learn all about pollinators through this lesson in the National Science Teacher's Association series, Picture-Perfect Science. Hands-on STEM about a very important topic!

http://www.shareitscience.com/2016/04/pollinators-picture-perfect-science-lesson.html


Real-Life Kermit Inspires Animal Classification Lessons 
Investigate animal classification by learning about a new species of frog! Ideas here for Preschool through High School. 

real life kermit animal classification lessons preschool through high school

BPA-Free Plastic? Possibly the Same Health Risks
Learn the research between BPA and BPA-Free plastics, with links to lessons on plastics and materials science for students.


BPA-Free Plastics health risks student resources


STEM Opportunities Where the Bison Roam
Learn about the reintroduction of the Wood Bison in Alaska, a once locally extinct species. Incorporate this project into an awesome STEM lesson.


STEM Lesson Wood Bison Reintroduction

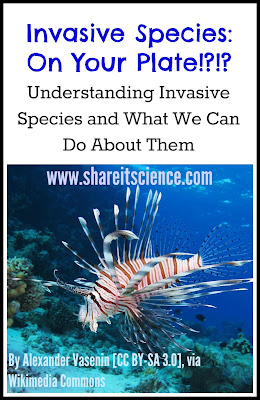
Invasive Species- On Your Plate!
Learn all about invasive species and what some people are doing to try to help eradicate them!


invasive species invasivore


See it? Share it! Nature Observations
Learn more about plants and animals with these posts on my adventures in nature! Have you ever seen a black colored gray squirrel? Do you know what a gall is? Learn here! 


Like what you're seeing? Don't miss another post from Share it! Science, subscribe by e-mail!
 
Enter your email address:


Delivered by FeedBurner


Composting with Worms! A Great Activity for School or Home

Today we’re joining forces once again with the Growing with Science blog to invite you to learn more about composting. We’ll focus on worm composting, or vermicomposting. Read on to find out how to build and maintain your own worm composting bin. This is an awesome way to learn about compost and decomposition at home or school. 

Hop on over to Growing with Science for some fun decomposition and compost critter activities. You’ll also want to check out this excellent children’s book list on composting and decomposition. 
 
Composting is an excellent activity for children. It’s not only a good environmental practice but there are so many lessons to be learned. How do nutrients get recycled? What is decomposition? What is the difference between insects and other arthropods? Why are worms so helpful?


Worm Composting www.shareitscience.com


This post contains affiliate links, meaning I will receive a small commission (at no additional cost to you) if you make a purchase after clicking a product link. Please see disclosures page for more details.

The great thing about compost is that it can be accomplished on a small or large scale. For home gardens and classrooms small scale composting is easy to start and will keep kids engaged throughout the entire year. 

Worm composting is one excellent way to introduce children to the composting process. Maintaining a worm bin is simple, it creates little to no odor, and you will always have a supply of worms for some hands-on learning!


Building and Populating Your Worm Compost Bin


You can easily build your own worm bin, or you can purchase one. I inherited a Worm-A-Way bin filled with worms when I took on my teaching job.

It was an excellent little worm bin and we maintained worms in the classroom with this set-up successfully for 7 years. (When issues arose, it was my fault, which I will explain later!) 

Currently, this bin is unavailable through Amazon, but you can find many other alternatives like this one.

If you are interested in building your own bin, like this one that we keep in our basement at home, it is fairly simple.
DIY vermicomposting bin worm composting
Vermicomposting Bin. Yes! We have worms in our basement! ©SBF 2016

To build your own worm bin you will need: 

We purchased a plastic storage bin and drilled some holes towards the top for ventilation. We also covered our holes with some screening like this, as an extra precaution for worm escapes, but under good conditions worms won’t bother traveling.

worm bin composting vermicomposting
Ventilation- worms need to breathe too! ©SBF 2016
Drainage is key! We drilled a hole towards the bottom of the bin to be able to drain liquid out of the composter if necessary. We plugged up the hole with a rubber stopper. In a household of 2 science teachers, finding a rubber stopper was easy, but if you don’t have this type of supply readily available, you can purchase them very inexpensively here. You can see that we weren’t happy with our first attempt, so we ended up creating a second hole.

worm bin vermicomposting compost
Two attempts at an effective drainage hole. ©SBF 2016

Worm bins need to stay damp, but not too wet. This liquid is excellent fertilizer, and any that builds up in your bin needs to be drained out.

Your worms will need some bedding. We use shredded recycled paper or newspaper. If you do this, I recommend trying to avoid using paper with a lot of colors and dye on it. This is a great way to recycle all those pre-approved credit card deals you get in the mail! You can also use peat moss or coconut fiber (coir) as bedding.

Worms aren’t like us; they don’t have teeth to grind their food. Instead worms grind their food with the strong muscles in their gizzard. Your worms will need a bit of garden soil to provide some grit to help them grind their food. Once you have a well-established bin, they will find what they need there and you won’t need to add more soil.

Choosing Worms for the Worm Bin


Now the most important part: the worms! You can’t put just any old worm into your bin. Not all worms are suited for recycling waste and living in this situation. The best worms for small vermicomposting operations like yours are Eisenia fetida, otherwise known as the red wiggler. These are epigeic worms, meaning they live in decaying organic material, not soil.

vermicomposting DIY worm bin red wigglers
Red wigglers! ©SBF 2016

Earthworms that you may find in the soil of your garden are endogeic worms. This means they spend most of their time in the soil among plant roots. Earthworms do not do well in the worm bin! Red wigglers are small worms. You can find them in nature in organic-rich areas like compost heaps and in cow pies. 

Don’t worry, if you are not inclined to harvest some worms from a cow pie, you can also purchase Eisenia fetida from many online retailers or home and garden stores. You can also get them online. Here is one reasonably priced option for live Eisenia fetida. You can also find composting worms on Amazon. 

If you know someone who has a healthy worm bin, you can also adopt some of their worms. Once your worm bin is chugging along, you’ll be able to return the favor. 

Please note: If you are looking to compost on a large scale, an outdoor compost bin will serve you better than a small worm composter. Vermicomposting in this sized bin is excellent for small batches of food scraps and for educational purposes.

Feeding Your Worms


So you’ve got the bin, and you’ve got the worms. Now what?

I’ve read many times that one pound of worms (about 1,000) can eat up to half a pound of food waste per day. I’ve never tried to count my worms, but even when my worm bin is at its healthiest, it cannot handle half a pound of food waste per day. Balance is key in this micro-ecosystem. The amount of food waste your bin can handle will vary based on a variety of factors.

©SBF 2016
Worms plow through food more quickly when it is in smaller pieces. Kitchen scraps work well. You most likely will find that you’ll need to experiment with your bin to find the right ratio of food to worms. Start with small amounts once a week, or every few days. Be patient until you find the balance.

You can feed your worms fruit and vegetable scraps, shredded paper, coffee grounds, eggshells, plain rice, pasta or bread. Avoid food scraps that have oils or dressings. Keep dairy products out of your worm bin, as well as meat or bones. Don’t feed them glossy or waxed paper. Never use your worm bin to decompose pet waste, as animal feces can contain harmful bacteria and parasites.

Troubleshooting the Worm Bin 


Worms are not difficult to keep alive, however, the conditions in your bin do need to stay balanced. As I have mentioned before, worms need to stay moist, but not too wet. Too much moisture is one of the biggest issues I have run into with vermicomposting.

Your worm bin should never have an unpleasant odor. If it does, it probably means that it is too wet or too much waste has built up. The one time my bin failed was because I did not take the time to empty it and refill with new bedding when I should have. When things went wrong, they went really wrong and the entire bin was a loss.

That said, this won’t happen to you as long as you pay attention to a few things. The first is that you are not overfeeding the worms. When you put food scraps into the bin, cover them with bedding. If those scraps are not gone the next time you go to put food in there, do not throw a lot more in. Once your worms grow in population, you’ll notice the food scraps will go more quickly and you will have a better idea of how much your bin can handle.

Our worm bin- in need of some new bedding, but otherwise happy! ©SBF 2016

If there is any build-up of liquid, simply drain the bin out and add some more bedding (shredded paper or newspaper). This excess moisture can cause worms to drown, food waste to spoil and other unpleasantness. Your bin should never have a foul smell. If it does, then this is most likely your problem.

If your worms begin to jump ship, you also have a problem. Happy worms will stay put where their food and bedding is. If you notice your worms crawling out, or staying high up on the walls of the bin the conditions are not right in there. Check to be sure that it is not too wet, and that it is not dried out in the bin. If wet, drain, and if dry add some bedding that is damp (not dripping!).

You might find over time that you have other critters in your bin. If you use thick bedding and only add scraps fresh from the kitchen (rather than outdoor plant material) you won’t have too many problems. Fruit flies and small white worms in the bin are harmless. If you find you have larger insects, you may want to clear the compost out of the bin (see how below) and add fresh bedding. Some insects can harm your worms.


Harvesting the Compost


When the bin begins to fill with worm castings it is time to harvest your black gold and use it on your garden and houseplants. 

Kids love to help with this process. I’ve had students sort through piles of vermicompost and gently put the worms back into the bin and keep the castings out. This does take a while, but if you are working in a classroom it can be a quick process.

If you plan ahead, you can make the bin cleaning process very easy. Scoop the contents of the bin to one side. Put fresh food and bedding on the empty side. The worms will begin to migrate to where the new food and bedding is. Within a week or two the worms will mostly be on the side with the bedding and you can scoop out the compost without losing too many of your wigglers.

What Can You Learn from Worms? 


It is always handy to have some worms available in your science classroom or for learning at home. Students can observe their locomotion and habits. They are useful in teaching how to be gentle and respectful of living things. Worms are excellent to introduce decomposition and how the Earth recycles nutrients.

If you scoop out some worms and compost you can challenge kids to make great observations. What do they see in the compost? What parts of the food waste are left behind while others quickly decompose? Can you find a worm egg?

Worm "eggs" or "cocoons". ©SBF 2016


In my experience, I’ve found the following books to be excellent teaching tools and resources:

Wiggling Worms at Work by Wendy Pfeffer This book outlines the importance of worms and the basics of their daily lives in beautiful paper collage illustrations. Excellent for elementary students!

Diary of a Worm by Doreen Cronin Kids love this book. It is a humorous fictional story, and gives ample opportunity for comparing a cartoon worms to real worms. I’ve also used it to create a reader’s theater activity for second graders.

Compost Critters by Bianca Lavies This picture book is laden with excellent photographs of the different organisms that work as decomposers. Once you’ve learned about worms, you’ll want to learn more about these other awesome critters as well!

Subscribe for more Science, STEM and STEAM ideas and resources

* indicates required

Intuit Mailchimp


The World's Water Situation: A Science Demo for School or Home


Have you ever tried to reason with a kid about why they shouldn't waste water? "Why? It just keeps coming out of the faucet!" Just telling them not to waste it is probably about as effective as our parents telling us to eat our vegetables because there were starving kids in far off places. "So what? They won't get this food whether I eat it or not!"

Kids (and adults!) in developed parts of the world often take water for granted. We are lucky, unless we are experiencing a drought, to have a fairly consistent, clean water supply. This is certainly not the case everywhere.
by Scott Robinson
Let's look at 2 current events in the world's water situation. We've got some good news and some bad news. Then we'll explore a really effective hands-on way to educate about water conservation.

This post contains affiliate links, please see disclosures for more details. 

So first, the bad news... Have you heard about the toxic foam that forms on Bellandur Lake in India? I hadn't until I was assigned a writing piece on it. A combination of industrial waste and raw sewage has created a dire situation in this lake in the highly populated city of Bangalore. For decades pollution has been dumped in a series of canals that ends in Bellandur Lake. The winds and rain from monsoon season just add to the problem and make the foam build up. The foam flies through the air and builds up on the roads slowing traffic much like a snowstorm. It is giving people headaches, smells awful and sticks to your skin. Last May it even caught on fire! Lack of government funds, policing and environmental regulations prevent the problem from getting any better. Sort of a foamy nightmare.


The good news...An incredible young innovator has devised a plan to help clean up the Great Pacific Garbage Patch. Boyan Slat, a young Dutch entrepreneur and inventor, has an ingenious and cost effective plan in action to clean up a large portion of the bits of plastic that are floating, and breaking down, in the ocean. This plastic is slowly making its way into the food chain and causing human health issues, not to mention the devastation to aquatic wildlife as the trash floats around in the water. Slat's plan uses natural circular currents in the ocean, called gyres, to passively collect the plastic. It is corralled and collected, then recycled into oil to offset the cost of the collection. Amazing. Read more about his project, The Ocean Cleanup, here in the kid's article I wrote for DOGOnews.


So, there are negative things happening to the world's water, and some positive efforts to make changes for the better. The lesson for our kids is that although Earth is covered in water, very little of it is available for us to use. That is why we need to conserve what we have.

An effective hands-on way to show this is to do this demonstration at school or home. You can have students or your children help measure out the water in each step. Through the years I have come across many variations of this lesson. Here are two versions that I have adapted. One version is for those of you with access to science lab containers, like graduated cylinders, and the other version uses things you can more readily find around the house.

 
Version 1: The World's Water Demo with Materials from the Science Lab


Supplies:
  • 1000 ml graduated cylinder
  • 100 ml graduated cylinder
  • 10 ml graduated cylinder
  • petri dish (or any dish)
  • eyedropper
  • water
1. Fill the 1000 ml graduated cylinder with water. This represents all of the water on Earth.

2. Now pour 30 ml of this water into the 100 ml graduated cylinder. This represents Earth's fresh water. The remaining 970 ml represents the salt water in the ocean. We can't drink salt water!

4. Carefully pour about 6 ml of the "fresh" water into the petri dish. This represents the fresh water that is not frozen in ice caps or glaciers.

5. Of the water in the dish less than 1/3 represents water that is available above ground. Take an eye dropper and remove 1 drop of water from the dish. This represents the water that is clean, fresh, not polluted and otherwise available to use.


Version 2: The World's Water Demo with Materials from Home

Supplies:
  • 1 gallon jug
  • 1/2 cup measuring cup
  • 1 Tablespoon
  • eyedropper (or a straw to make a drop)
  • water
1. Fill the jug with water. This represents all of the water on Earth.

2. Take 1/2 cup of this water and pour it into one of the clear cups. This represents Earth's fresh water. The rest of the water in the jug represents salt water. We can't drink salt water!

3. From the 1/2 cup of water in the clear cup, take 4 Tablespoons of water and pour this into the second clear cup. This represents the fresh water that is not frozen in ice caps or glaciers.

4. From the cup with the 4 Tablespoons of water, remove one drop with the eyedropper or straw and put it in the third clear cup. This represents the water that is clean, fresh, not polluted and otherwise available to use.


Pretty mind-blowing, huh? Well there is good news here and there is bad news. The bad news is, we don't have a ton of available fresh water on Earth, so we need to understand how precious it is. The good news is we can teach our kids to conserve it!

 
For other ways to teach water conservation and test water quality, read my post: Science Teacher's Toolbox: Testing Water Quality

http://www.shareitscience.com/2015/06/science-teachers-toolbox-testing-water.html

You might also want to check out Smarty Pants' TED-Ed video as a way to introduce water conservation!

Try these books to teach about water conservation!