Share it! Science : food
Showing posts with label food. Show all posts

Maple Syrup: Sweet and Sticky Science

In New England the sap buckets are going up on the sugar maple trees. As the thaw begins maple farmers are beginning to harvest sap for one of my favorite treats...maple syrup! 

There is so much to learn in the process of maple sugaring. Science, math, botany, engineering, history! Here is some background on the process of making maple syrup and lots of learning resources. Whether you hail from an area that makes syrup or not, there is something here to help you teach kids about maple syrup.  

When you are finished with the learning, may I suggest consuming some pancakes and syrup as a capstone to your maple syrup unit? 

This post contains affiliate links, meaning I make a small commission from purchases made from these links at no additional cost to you. Please see disclosures for more information. 


maple sugaring syrup science learning resources

Making Maple Syrup 

Maple syrup is a versatile sweetener full of antioxidants. A secret treasure humans have borrowed from nature. 

Maple syrup is a product made from the sap of a sugar maple tree. When winter begins to thaw into spring and temperatures fluctuate back and forth from warm to freezing the sap begins to flow. 

Positive pressure builds in the tree when temperatures rise above freezing. This pressure forces the sap out of holes made in the tree for sugaring. Then as temperatures dip to below freezing again, negative pressure develops. This causes suction to draw water into the roots, replenishing the sap. The freeze-thaw cycle allows sugar farmers to collect sap during a short window of time as winter turns to spring.

Native Americans and European settlers collected the sap of sugar maples as it began to flow during early spring thaws. Much as we do today, they painstakingly boiled it down into a syrup. It was an excellent way to preserve food without refrigeration.

tap in a sugar maple tree collecting sap science education resources

Today trees are still tapped and sap is collected in buckets, as has been tradition for years. More modern methods include collecting syrup through a series of plastic tubing and utilizing methods like reverse osmosis to maximize the time spent harvesting and boiling sap.

Sap is boiled down into syrup. In general it takes 40 gallons of sap to make 1 gallon of syrup. It is a time and labor intensive process for a small yield. Remember to thank a maple farmer next time you are enjoying some glorious maple syrup! 

Maple Sugaring Teaching Resources

If you are fortunate enough to live near a sugar bush, then perhaps you can take your class or children on a maple syrup field trip! If not, here are tons of other learning resources for learning at home or in the classroom.  

A maple video and worksheet for each grade Kindergarten through Junior high from Cornell: Maple in the Classroom. 

When will the sap run? A free printable math activity, identify which days the sap will run based on a month of temperature fluctuations. 

For grades 4-5th, 26-pages of background and student activities for maple sugaring season. 

Make your own maple candy from syrup in this Science Buddies activity.

boy collecting maple sap sugaring season

25-page digital download with videos, Maple Syrup Making Unit Study

K-2nd grade activity, Be a Sugar Maker, students role-play the process of maple sugaring.

Maple sugaring picture book list.

3-5th grade activity, Nature's Factory at Work, build a model of a tree and learn the process of photosynthesis. 

Tree rings activity, learn the age of a maple tree.  

Maple Mini Study for PreK-2nd grade.

kids collecting maple sap science education

6th-12th grade, learn about Maple Sugar Molecules and Crystals while making your own rock candy.

Free, downloadable maple information posters. 

Preschool and elementary Maple Syrup Study Unit, 8 activities. 

Many more Maple Syrup learning resources here!


More Maple Syrup Fun

Use that maple syrup with these awesome maple syrup recipes for kids

Some picture books to share with the kids on maple sugaring.  


Thanksgiving Dinner Trophic Pyramid Activity

Those school days before a break, holiday or vacation can be pretty exhausting for a teacher. The kids are excited and wiggly (can you blame them?) The teachers are running out of steam. There are often special assemblies, field trips and other things that make the normal schedule not so normal, adding to the fun. It is an uphill battle!

When I was teaching during chaotic times like these I tried to find a way to create activities that still allowed for learning but were not too vexing for the students or myself. The day before Thanksgiving was one of these times! 

I would teach a unit on ecosystems with my fourth graders, including food webs, chains and trophic levels. To wrap this up before we took a few days to stuff ourselves with turkey I liked to do this easy "Thanksgiving Dinner Trophic Pyramid" science activity. It really illustrates that humans also consume more at the lower levels of the energy pyramid, just as in any ecosystem.

This post contains affiliate links, meaning I will receive a small commission (at no additional cost to you) if you make a purchase after clicking a product link. Please see disclosures page for more details.


Materials for Thanksgiving Dinner Trophic Pyramid

You will need:

Background Information for Trophic Pyramid Lesson

A trophic pyramid, also known as an ecological pyramid or energy pyramid is a graphical representation of food energy levels in an ecosystem. In other words, who eats who and how energy moves up the food chain. The widest part of the pyramid is made up of plants, the narrow point at the top is reserved for the top predator/carnivore. For more background and an activity to learn about trophic pyramids, check this lesson out.

A great book for learning about how energy moves through an ecosystem or food chain is: Pass the Energy Please! by Barbara Shaw McKinney. It's great for a read-aloud (even to early middle-schoolers) or as inspiration for writing and illustrating food chain rhymes.

Thanksgiving Dinner Trophic Pyramid Activity


Draw a very large triangle on the white board, or mark off a triangle on the floor with tape. Give it 4 sections, labeled from bottom to top: "Producer", "Consumer-Herbivore", "Consumer-Omnivore/Carnivore", and "Apex or Top Predator".  You can also get the printable version of the trophic pyramid here.

Give students three 3x5 cards, or post-it notes. Instruct them to draw and label something they like to eat or drink on Thanksgiving on each card. They will then tape their card up in the part of the pyramid they believe it belongs in: "Producer", "Consumer-Herbivore", "Consumer-Omnivore/Carnivore", and "Apex or Top Predator".

Some might fit in more than one category based on ingredients. In general all plant-based items should go in the "Producer" section, any animal products will go in the "Consumer" sections, based on what type of animal. Most likely for your purposes, you won't have anything that goes in either "Consumer-Omnivore/Carnivore", and "Apex or Top Predator" sections.

When finished discuss what they notice about the diagram. For sample questions, download the Thanksgiving Trophic Pyramid lesson plan here. 

More Food Science Activities for Thanksgiving 

Try these other fun science activities with your children or students in November: 


Pickle Science with Thriving STEM

For this week's Spectacular Summer Science Series post, head on over to Thriving STEM  for "How To Learn Chemistry By Making Delicious Pickles". Science is always a little more fun when you add something edible into the mix, don't you think? This is a perfect summer time family activity.

www.thrivingstem.com

For other great summer science ideas, check out the other posts in this series and follow my Pinterest board- Summer Science!

 
Excited to do more science this summer? This is just one post in the Spectacular Summer Science Series! Sign up to get Share it! Science News posts by e-mail so you don't miss out!

http://www.shareitscience.com/2016/06/summer-science-STEM-activities.html


Enter your email address:


Delivered by FeedBurner

Don't Blame the Turkey!

Happy Thanksgiving! Are you ready to feast? 

You've probably heard that eating turkey makes you sleepy. Or maybe by now you've heard that it's just a myth! Science says that you can indeed get sleepy after eating your Thanksgiving meal, but the turkey is not to blame.


Does Turkey Make You Sleepy? 


Turkey contains the amino acid L-tryptophan. Amino acids are the building blocks of proteins. After we've digested our turkey, L-tryptophan travels to our brain and is transformed into another chemical called serotonin. Our bodies serotonin use to calm us down and help us sleep. Scientists understand that L-tryptophan can only make a person tired right away if there are no other amino acids present in the meal. There are actually a lot of other amino acids in the turkey, besides the L-tryptophan, so turkey cannot be the culprit.

So why do we feel sleepy after Thanksgiving? There are other reasons why eating a large meal might make you sleepy. When you eat a lot of food, blood moves to the stomach to aid with digestion and away from other areas. With your blood headed towards the stomach there is not as much oxygenating your brain. It's what I like to refer to as the "food coma".

Some additional info on the drowsiness you may feel after the big meal: 


You can also read this article from the Connecticut Science Center, Does Turkey Really Make You Sleepy?

Thanksgiving Science Activities


Looking for a turkey science activity? Do you know how those pop-up thermometers work? Try this and find out: Exploring Melting Point: Turkey Timer STEM. 

Or my favorite, easy science activity for the crazy days before Thanksgiving, the Thanksgiving Dinner Trophic Pyramid.

More food science for Thanksgiving:


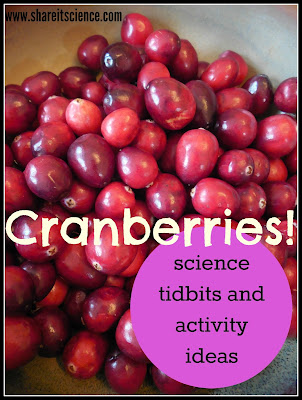
Thanksgiving Tidbit: Cranberry Science!

Thanksgiving is a great time to consider the science of food! What do you know about the bright, tart, cranberries that make up the cranberry sauce that accompanies your turkey? Here is a hint: it doesn't start out as jell that is shaped like a can! In this post we'll explore some science facts about cranberries that might inspire some scientific thought during your celebratory meal!

Cranberries are an interesting fruit. From growing in acidic bogs to their ability to float, there is a lot of fascinating science here! Here are some science tidbits about cranberries and some activity ideas to keep the kiddos busy on Thanksgiving.

Thanksgiving Cranberry Science Activities Facts

This post contains affiliate links, meaning I will receive a small commission (at no additional cost to you) if you make a purchase after clicking a product link. Please see disclosures page for more details.


Cranberry Facts


Cranberries grow in bogs. Bogs are a type of wetland, known for acidic water and thick sphagnum moss. Cranberries need fresh water to grow. To adapt to their acidic surrounding their tough stems and leathery leaves store fresh water. The cranberry has some small thin roots that help to absorb organic nitrogen, which is something they need to survive. If they could not absorb this extra nitrogen it would be difficult for the plant to survive in this sterile soil lacking in nutrients. 

Cranberry plants are very resilient. One that is undamaged can live practically indefinitely. Some cranberry plants in the bogs of Massachusetts are 150 years old or more!


So why is it when we see a commercial for cranberry products are they standing up to their waists in water? Are the cranberry bogs that wet? Some bogs do have fairly deep water. However, the cranberry bogs most likely do not. Due to air pockets inside the cranberry, they have the ability to float. Farmers realized that it was easier to harvest the berries by flooding the bog and scooping them from the water. 

Cranberry STEM Activities


Do your cranberries float? If you have some fresh berries, try it out! Cut one open. What do you see? 

The open space in a cranberry allows it to float!

inside a cranberry air pockets science lesson
Inside the cranberry! ©SBF 2015

You can also use the acidity of a cranberry to do some pretty cool secret spy science. Make some cranberry "Spy Juice" and write some secret messages using the directions for "Spies and CSIs". 

Can you build a raft from cranberries? Try this cranberry raft engineering challenge. A great way to keep the kids busy while you cook the bird.

More Thanksgiving Science


Check out this fun STEM exploration of those pop-up timers that come in your Thanksgiving turkey.

Here is another great Thanksgiving dinner science activity, super easy to set up, my go-to for those crazy school days before Thanksgiving break! 

You might also want to try some of the experiments here at the Thanksgiving Food Lab.


cranberries science and activities

Glimpse of the Garden: Week 25, A Race Against Time

'Tis the season for harvesting fruit and veggies. Maybe you are overrun with tomatoes or squash. What is the best way to preserve your harvest before science takes over and those beautiful veggies start to spoil? Luckily, there are several options depending on the amount of time you have to do it, and your level of expertise.

Harvesting your garden is also a great kid's activity. Kids love digging potatoes, harvesting popcorn, and pulling carrots. There is also a ton of science involved in food preservation, including concepts like: pressure, vacuums, bacteria, decomposition, life cycles, etc. There are so many ways to make this type of work a fun, learning experience for you, your students or children.


This post contains affiliate links, see disclosures for more details.

Tomatoes on the window seat, tomatoes on the counter, tomatoes in the freezer and tomatoes on the vine. I would love to make some pasta sauce with those beautiful Romas and San Marzanos, dice up the Costolutos and put them in jars. I would even like to roast some cherry tomatoes and pop them in the freezer for a mid-winter treat. I know what you are thinking, "Well then, less talk, more action!". Alas, you need a critical amount of tomatoes of each type before you begin to can, blanch, freeze or dry and they don't all ripen at once.
©SBF 2015
Gardening is part patience, part intense action. Here we are at week 25 of my garden adventure for 2015 and I've waited patiently for this moment to come. Once your produce is ready there is only a small window of time before it becomes overripe, or an opportunistic woodchuck, chipmunk or rabbit comes along...instead of "hurry up and wait" we're playing a game of "wait and hurry up".
©SBF 2015
So what is the rush? How can you preserve your beautiful produce to save for later instead of eating salads for the next 3 weeks? Why do you need to process it, heat it to a certain temperature, freeze it solid or dry it out?

Microbes


Microorganisms, such as bacteria, are ready to do their part in the decomposition portion of your plant's life cycle. The plant grew your produce as a way of disseminating its own seeds, not as a kind gesture or repayment for watering it all summer. Once it has grown its fruit, eventually it will spoil. Bacteria are everywhere, and can be helpful or harmful to humans. Many of the bacteria you find in ripening and rotting veggies are not the helpful kind!
©SBF 2015

How Can You Preserve Your Harvest? 


Drying or Dehydrating


Drying foods to preserve them was most likely another happy accident. The sun and wind are pretty good dehydrators. Most microbes that cause disease enjoy a moist environment to multiply in. When food is dried out it becomes an inhospitable place for those types of bacteria. You can dry produce in your oven or in an electric food dehydrator. Check out the Colorado State University Extension page for more information on drying and dehydrating your own vegetables. Electric food dehydrators can also be purchased fairly inexpensively.


Blanching and Freezing


Freezing veggies is a quick and fairly easy option to preserve them for later use. Before you freeze vegetables you should blanch them. Blanching is a process in which you heat the vegetables for a short period of time in boiling water. They are then removed and placed in an ice bath to stop the cooking process.

Blanching breaks down the enzymes that are at work ripening your food. The boiling action also helps to kill any microorganisms on the food. The blanched vegetables can then be placed in freezer bags or containers and frozen for longer periods of time. Different vegetables have different blanch times. See this link for the appropriate times for different types of produce.


Canning


Although a little more labor intensive, canning is one of my favorite ways to preserve food. If you follow a recipe and work carefully then the result is safe, well preserved food that looks awfully pretty in a jar, too. I use a heat bath canner. Basically this means that after your jars are packed you boil them for a certain amount of time to destroy any harmful microorganisms and to vacuum seal your jar shut.


Recipes for canning fruits and veggies will help you to determine if you need to add anything acidic to the jars to help preserve the food. Lemon juice and citric acid are common natural additives to preserving food canned at home. Microorganisms cannot tolerate acidic environments. I will be chronicling the process of canning my tomato sauce for you in a future post- stay tuned. For some great tips and recipes for canning, you should visit the Pick Your Own site.

For tried and true canning recipes, I recommend  Ball Complete Book of Home Preserving


©SBF 2015


I'm excited this year to have produced enough tomatoes to make some sauce and can it for the winter. Slowly but surely, the tomatoes are ripening (I need 10 lbs of them). We're almost there, just some more patience. Then someday soon the tomatoes will be ripe and they will no longer wait. Time for that intense action I spoke of earlier. I will begin the job of blanching and peeling and cranking the food mill. I'll slowly simmer the sauce and then pack it into jars and put them in a hot water bath. It will be hours of work, but well worth the effort, the patience and time. 

More on the science behind food preservation:

Elevated Raised Beds

Glimpse of the Garden: Week 23, Small Potatoes!


We harvested our "trash can" potatoes. Not the biggest yield, but we enjoyed some in the oven with some shallots, garlic and olive oil. YUM! Everything tastes better when you grow it yourself. 

Red and white potatoes. ©SBF 2015

You may remember planting these potatoes back in May, "Glimpse of the Garden: Week 7, Seed Potatoes".

Harvesting from containers is easy. We spread out a tarp, and then dump out the contents! 


Finding the potato treasures is the fun part. This step is what makes growing potatoes with kids a great project, they love to dig around in the soil!


The all red variety was a beautiful magenta color.


This year my potato plants did not blossom and were sort of spindly. I'm not sure if this had to do with the weather or some larva we found in one of the trash cans. Hopefully next year will be better! 


At risk of sounding like a broken record, for this and other great container gardening ideas check out my favorite small-scale gardening book: Grow Great Grub: Organic Food from Small Spaces (affiliate link)

What are you harvesting? What is your favorite way to enjoy potatoes? Comment below or share on our Facebook or Google+ pages.

(affiliate link)
Grow and Make

Franken-trees: Tree Grafting Projects

photo by Glysiak (Own work) [GFDL or CC BY-SA4.0-3.0-2.5-2.0-1.0], via Wikimedia Commons
You might have seen the "Tree of 40 Fruit" story that has been buzzing on the internet. This fantastic project involving grafting many types of fruit trees together into one tree can be a great launching point for educational field trips to orchards in the late summer or early fall, and tree grafting science projects. Most of the apple trees at our modern orchards are varieties that have been grafted.

So what is grafting anyway? Grafting is a process where growth from one type of tree, called a scion, is fixed to the root stock of another tree. When a tree is grafted, we are, in a sense, taking advantage of the healing properties of the tree. The two "wounded" parts of tree begin to heal and grow together. Grafting is common in orchards because grafting apples or other fruit-bearing trees to dwarf root stocks allows for more trees to be planted on a property and makes harvesting safer as the trees stay smaller.

The "Tree of 40 Fruit" project grafts may varieties of stone fruit together to make a tree that grows 40 different types of fruit. Not only does this tree produce a lot of different fruit, but it is an art project. The blossoms are different colors and so are the fruit. The designer of these trees, Sam Van Aken, is a botanist and artist. He plans the trees very carefully. You can learn more about his process in this video and his TED talk:


Grafting trees or other plants, such as cacti, can be a fun science project. It takes some patience, but leads to a much deeper understanding of plants. To understand how grafting works, you need to understand the plant's vascular system, or how food and water move through the plant. This goes beyond plant anatomy like leaf, stem and root. Grafting is a great introduction to xylem, phloem and the cambium of a tree. An excellent way to teach kids about tree anatomy is through the movement activity "Tree Factory" by Project Learning Tree Another version of this activity can be found here.

For some info on how to graft your own tree or plant, you might check out this page from the Exploratorium or this information from the National Gardening Association. Although this grafting science fair project is for older students, with help from an adult younger kids could definitely participate. Your local orchard or cooperative extension is likely to have information and resources to help get you started!

Once again, learning is delicious!

Read more:


Resources and Activities:


Grow and Make

Glimpse of the Garden: Week 17, Isn't Summer Delicious?


It's really beginning to happen around here! Because of the elevation of my home, we seem to always be at least 2 weeks behind when it comes to flowers and veggies. This week everything is blossoming and starting to really produce.  


Do you have a great garden photo to share? Some flowers, fruits or veggies? Great kid-gardening? Starting next week I'll be sharing reader's photos. You can send them via e-mail to shareitscience@gmail.com or share them via social media with the hashtag: #shareitsciencenews

I can't wait to see what you've been growing! 


Pea pods! ©SBF 2015

Zucchini flowers ©SBF 2015

Glimpse of the Garden: Week 15, Much Ado About Mulch

Weeds. Something any gardener has to contend with. How do you keep your weeds down? This year I am combining some grass mulch and cardboard to help keep the weeds from sprouting. Mulching your plants can have many benefits. It keeps light from getting places you do not want plants to grow, it helps to hold moisture in and insulates the soil which can lead to increased growth in plants that prefer warmer soil. 

Depending on what you use to mulch, it can also improve the quality of the soil. Grass clippings are a great idea in the vegetable garden. They are free, plentiful and have the added benefit of adding nitrogen to your soil. When you mulch with grass, it is important to lay it down over the soil in thin layers. Otherwise you might heat up the ground too much and scorch your roots, or find a thick, moldy mess when it begins to break down. Please note, if you use any insecticides, chemical fertilizers, etc. on your lawn, I do not recommend mulching anything you plan on eating with grass clippings as those chemicals may make their way into your food.
Some spicy nasturtiums, mulched with grass clippings. ©SBF 2015

Eggplant, peas, scallions, zucchini and corn, avoiding the weeds and enjoying some warmth with the help of grass mulch. ©SBF 2015

Onions ©SBF 2015

I have also found that cardboard, as long as it is free from dyes and stickers also works well as mulch. It keeps the moisture in, breaks down slowly over time and is not harmful to plants. Both of these ideas are fine for those of us looking for an organic alternative to combating weeds. If you are going for aesthetics there are other organic choices that may look nicer, but I am just growing for healthy food, so I don't mind! What do you like to mulch with? 

Tomato and basil sprouts with some cardboard mulch. ©SBF 2015

This week some of my favorite flowers opened. (Do I say that just about every week??) The bee balm, like a firework, and the fascinating purple balloon flower. What have you got blooming? 


(affiliate link)
homegrowncollective.com