Share it! Science : storybook science
Showing posts with label storybook science. Show all posts

DIY Seed Germination Jar: A Must-Have for Your Plant Unit!

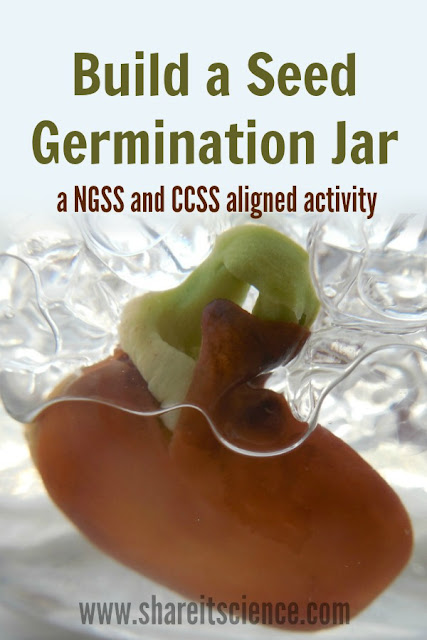
Seed germination is one of nature's little wonders. Giving your kids and students the opportunity to grow a plant of their own can be a magical experience. Unfortunately, we most often stick the seeds in some soil where we cannot see what happens as the seed becomes a tiny sprout. You can easily solve this problem by building a germination jar so that kids can see the entire process in action!

Building the germination jar is easy, and it is the perfect addition to your plant unit at school or in your home-school. This inquiry-based science activity is linked to K-2 Next Generation Science Standards and offers an extension idea to align with Common Core English and Language Arts standards as well. Paired with a wonderful children's book, you'll definitely want to add this to your spring to-do list for school or home!
Elementary School Seed Plant Science Experiment


This post contains affiliate links, meaning I will receive a small commission (at no additional cost to you) if you make a purchase after clicking a product link. Please see disclosures page for more details.
 

Growing "One Bean"


There are so many science lessons and life lessons learned when children grow something themselves. You can make this activity a part of a science unit on life cycles or just an introduction to gardening with children.

First, we read One Bean, a sweet picture book by Anne Rockwell. In this story a boy plants a bean seed and watches it grow. Although told in a narrative style, anyone could follow the process of growing a bean seed themselves along with the story.


The boy puts the bean in a damp paper towel to prepare it for planting. Once it is wrinkled, he plants it in some soil and waits for his seed to sprout. This is where most planting projects become mysterious! The beauty of your germination jar is that you'll be able to watch the process unfold.
Fava Bean Germination Science Experiment NGSS Aligned

Build a Germination Jar 


To build your seed viewer, or germination jar, you'll only need a few supplies:
Water beads are pretty amazing! You only need a few at a time, and you can dry them out and reuse them for other projects.(They would be great to study absorption as well, as they soak up that water and grow to be 100's of times their original size.)

There are many ways to germinate a seed by keeping it moist, including wrapping in a damp paper towel like in the bean story we read. However, I like that by using the water beads, you do not have to cover the top of the jar up with plastic wrap or something else to hold the moisture in. I have used that method many times to teach children about plants. It works, but it can also lead to mold growing because it sometimes stays too wet.
Build a Seed Germination Jar for Science Experiments

You will have to experiment with how many water beads and how much water to use. The jar we began with ended up being far too large, so eventually we moved our experiment to a smaller glass. Start by using just a few water beads- a tablespoon of them can go a long way. Pour a bit of water on and let them absorb it for a couple of hours before adding anything else.

You want your jar to be moist, but not too wet. You will need enough water beads to hold your seed in place, but not so many that there is no room to grow. This is the experiment within the experiment!


Watch a Seed Germinate


Before you start, soak your bean seed(s) in a glass of water over night. This really helps to get them off to a quick start. We chose fava beans because they are easy for small hands to hold and are large so you can really see what is going on with them.

Once you've soaked your seed and prepared your water beads, place the bean seed so that it is close to the side of the glass and easy to view. Be sure that there are water beads over the top of the seed so that it stays moist.

Watch a seed germinate, great activity for plant unit

Then, you wait! Until the seed begins to germinate, you might want to give the jar a little more water each day, carefully pouring it around the outside of the jar where the seeds are. Within a day or so, you should begin to see that first part of the sprout, the radicle, emerging from the seed.

Keep an eye on your jar. If your water beads seem to be shrinking, add just a bit more water. Once you have a green sprout, you can choose whether to leave the seed in the water beads, or plant it in some soil. If you plan on trying to keep your plant growing to maturity, I'd suggest planting it before too long.
Watch a seed germinate! Plant science experiment

If you are lucky enough to have garden space, then that is the obvious place to grow your beans, but for those with space at a premium, particularly schools, I would suggest investigating growing a pocket garden on a wall. Here is one example of a pocket planter.
 

Meet Common Core and Next Generation Science Standards


This seed investigation will work towards meeting these Next Generation Science Standards for K-2.
NGSS K-LS1-1
NGSS K-ESS3-1
NGSS 2-LS4-1

You can also work towards these K-2 Common Core English and Language Arts Standards by creating an observation journal that includes words as well as drawings.
CCSS.ELA-Literacy.W.K.3
CCSS.ELA-Literacy.W.1.3
CCSS.ELA-Literacy.W.2.3

More Plant Science Investigations! 


Learning with plants can continue throughout the spring and summer seasons. It is a great way to investigate biology concepts like pollination with elementary students.

One of my favorite experimental plant projects is growing an avocado plant from its pit.

Grow an Alphabet Themed Kids Garden

Try growing a themed garden with kids. Some theme ideas are: an alphabet garden, a rainbow garden, a taco garden, or a pizza garden, or a garden friends companion garden. 

Explore math and science with sunflowers, and learn the parts of the flower with students in preschool all the way through High School by doing a flower dissection

Storybook Science Series


This activity is part of the Storybook Science series. You can find more great book-linked science activities in this series on the Inspiration Laboratories blog.  

http://inspirationlaboratories.com/storybook-science-3/

You'll also want to visit my Storybook Science posts from past years:

"Here Comes the Garbage Barge" inspired Landfill Model

I'm excited to be participating in Inspiration Laboratory's Storybook Science series again this year! This time around we're exploring conservation with a children's book and science activity.

We make a lot of trash! When we throw something away...where exactly is away? Your students and children will gain a better understanding of where trash goes and what happens in a landfill by building this landfill model. 

Here Comes the Garbage Barge! is a great picture book to begin thinking about the problem of having too much trash. A great read and project for Earth Day!

This post contains affiliate links, please see disclosures for more information.


Read Here Comes the Garbage Barge!

Here Comes the Garbage Barge! is the fictionalized, but true, story of a barge full of trash that no one wanted. During the late 1980's Long Island's landfills were overflowing. Eventually the government stepped in and outlawed further burying of trash. So, it was decided the trash would be shipped to the south.


Here Comes the Garbage Barge! humorously tells the tale of colorful Cap'm Duffy St. Pierre and his tugboat and barge. As the garbage barge travels south word spreads and everyone is ready to turn poor Cap'm Duffy away. The adventure that ensues is funny, but also clearly illustrates the point that we create too much trash and no one wants to have to take care of it.

https://bookshop.org/shop/shareitscience


In addition the the subtle conservation message, the story serves as a great geography lesson. The interesting illustrations were created by making models and photographing the images. Much of the material used to make the models was repurposed trash.
 

Build a Landfill Model

Where does our trash go? If it is not reused, recycled or composted, in most cases, waste heads to the landfill. A landfill is much more than a pile of trash. Learn more about the anatomy of a landfill here. You can build the model below to better understand what a landfill is like. Once you understand landfills better, I bet you'll want to recycle even more! You will be able to observe your model over time to see how the trash in a landfill changes (or stays the same).
There are many layers to the landfill. To make your model you'll need the following:


Your first step will be to cut the top off of the plastic bottle. This will be the container you build your model in.


The first layer of your landfill will be soil. The base of the landfill is the natural soil of the land that the landfill is placed on. Because of this, great care is taken to be sure that any toxins in runoff water, or leachate, from the garbage do not end up in the native soil and ultimately in groundwater.


The next layer is compacted clay, or play dough for your model. The clay in an actual landfill provides another barrier to prevent leachate from entering the groundwater. It also helps gases to escape from the landfill.


The third layer of the model, plastic wrap, represents the geomembrane, a thin plastic sheet that again serves to prevent leachate from draining from the landfill. Do you sense a pattern? Leachate is nasty stuff!


You'll use cotton balls, spread thin, to represent the next layer of the landfill, the geotextile layer. This is part of a system that in an actual landfill uses pipes (not included in the model) to separate solids and liquids in the runoff from the landfill. The geotextile fabric prevents the pipes from getting clogged.


The fifth layer is a layer of gravel. The gravel layer is what collects the leachate as it originally exits the landfill's trash.


Finally, in the 6th layer up from the ground is the trash! In a working landfill, the trash layer is covered with soil daily. We added two layers of trash and soil to represent this. You may have room to add more layers of each in your model. 


Once a landfill has reached a specified height, it is closed off. There is another layer of clay added to the top of the last trash/soil layer.


Another geomembrane, or in our case, plastic wrap, is added.


After the plastic geomembrane is another layer of gravel that serves as drainage.


The landfill is topped off with soil and grass. We used some houseplants, but to be even more accurate, you can plant some grass seed in your topsoil.


Voila! Now watch your model. See if you can answer the following questions in the next days, weeks and months.
  • What happens to the trash over time? 
  • Do you notice anything changing? 
  • Can air and water get all the way through your model? 
  • How is this like a real landfill? 
  • What pieces of trash could have been recycled or composted? 

Why is it important to reduce, reuse, and recycle? So that our planet doesn't run out of space! Who wants to live surrounded by trash anyway?

For a printable photo tutorial that includes student worksheets for further landfill model observations click here.

To see all of the great posts in the Storybook Science series, head on over to Inspiration Laboratories!

http://inspirationlaboratories.com/storybook-science-2/


The Dandelion Seed: Design A Seed Engineering Challenge

Floating, flying, hitchhiking...plant seeds have many adaptations for survival. Challenge your kids or students to design their own seeds. What adaptations for survival do your seeds have? 

This is a great opportunity to learn the engineering process. Explore plant adaptations and life cycles. Observe the variety found in real plant seeds. So many possibilities here for science and engineering!

Design a Seed Engineering Challenge (www.shareitscience.com)

This post contains affiliate links, meaning that I receive a small commission for purchases made after clicking these links, at no additional cost to you. Please see disclosures for more information.

Amazing Plant Seeds


I love seeds! All the different shapes, the variety, the adaptations for survival, they are all pretty amazing. When learning about seeds with kids, one of my favorite picture books to read is the beautifully illustrated story, The Dandelion Seed, by Joseph Anthony and illustrated by Cris Arbo.


The story follows a hesitant dandelion seed as it floats away from its plant in the fall. Throughout its adventure it passes through the 4 seasons, by cities and countryside until eventually it comes full circle and grows into a dandelion plant. This plant makes seeds as well that head off on their own adventures on the last page.

The book is a great entry point to many science topics including plant life cycles, seasonal changes and plant adaptations. The topic of plant adaptations leads us to a fun engineering challenge: design a seed! Some seeds fly in the air, some float in the water. Some stick to the fur of animals, our socks and pants to get from one place to another. Some even must be digested before they can grow!

https://bookshop.org/shop/shareitscience

Seed Engineering Design Challenge


The engineering challenge will be to design three different seeds and test out their abilities. You'll design one that is meant to fly in the breeze, one that will float in water, and another that will stick to something fuzzy.

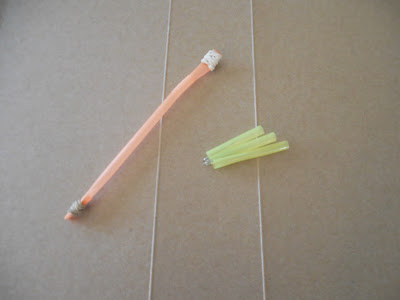
You can use any household materials for your design challenge. I suggest items such as: scrap paper, box board (cereal boxes, cracker boxes etc.) drinking straws, string, 3x5 index cards, rubberbands, paperclips and scissors. To make it more of a challenge do not include tape, glue or velcro in your supplies.
©SBF 2016

Although most seeds are fairly small, your designs can be as big as you'd like, as long as they float, fly and stick you've accomplished your goal!

Once you've created a seed that you think will fly, test it out! If it is a dry day you can take your seed outside, or (keeping safety in mind) drop it out an upstairs window. You can also set up a fan and test it indoors. (Please watch out for little fingers!)

Flying seeds ©SBF 2016
Flying seeds?! ©SBF 2016

How did your seed do? Do you need to redesign and try again?

You can test your floating seed in the sink, a basin or the bathtub.

Floating seed designs. ©SBF 2016
Testing floating seeds. ©SBF 2016
Find a fuzzy blanket, fleece jacket, or patient pet to test your sticky seed out. How well do they work? It is okay to tweak your design, that is what professional engineers do!

Sticky seed designs ©SBF 2016
Sticky seed designs. ©SBF 2016

Testing sticky seeds on a fuzzy blanket. ©SBF 2016

Picture Books for Studying Plant Seeds


Once you are finished, you might want to learn more about seed adaptations. What different shapes do seeds come in? Can you find any that look like the seeds you created? I suggest picking up a copy of Flip, Float, Fly: Seeds on the Move by JoAnn Early Macken, illustrated by Pam Paparone. This colorful story with fun text describes how many different types of seeds travel, with an example of each. Who knows, maybe it will inspire a new seed design challenge?


Another excellent non-fiction picture book is How and Why? Seeds Travel by Elaine Pascoe with photographs by Dwight Kuhn. This book has great close-up photography of seeds on the move and their growth and development. It wraps up with some additional learning activities to try.


If you enjoyed The Dandelion Seed, you'll also like the Joseph Anthony's second story about dandelion seeds, The Dandelion Seed's Big Dream. This one follows a seeds plight through some tough conditions before its dream comes true, to grow into a flower. Some science ideas here are persistence in nature, plant adaptations and life cycles. There is also a nice section in the back of the book with some scientific information about dandelion plants.


If you love books and science, then you definitely will enjoy the Storybook Science series at Inspiration Laboratories! 

Storybook Science